Showing posts with label Distilled Water. Show all posts

Monday, December 24, 2012

CANDIED PEELS * FIRST ATTEMPT

I found two candied peel recipes on the net, both very similar in method. Here's mine in pictures

cut orange for the peels


Wash and peel fruit.


boiling lemon peels
Lemons   


Place peels in COLD water and bring to a boil, time at 2 minute intervals and do this 3 times, for a total of 3 blanchings.
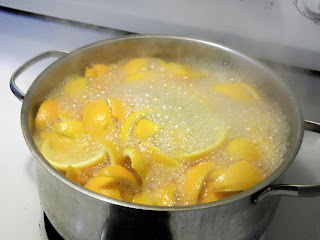
boiling orange peels
Oranges


I used oranges and lemons and kept them separate.


drain lemon peels after 3rd blanching
Third blanching


After the third blanching, drain well...
cut away the pith from a blanched orange
Cut off the pith


and cut the pith off to about 1/4 inch (its ok to leave a little more on)
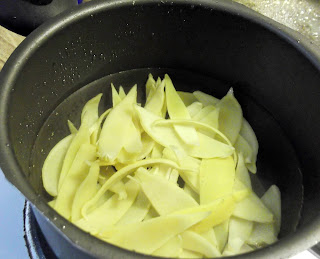
4th and 5th blancing of lemon peels
Fourth and 5th blanchings


Pour in more cold water and blanch 2 more times @ 2 minute intervals. Doing this removes the bitterness from the peels.


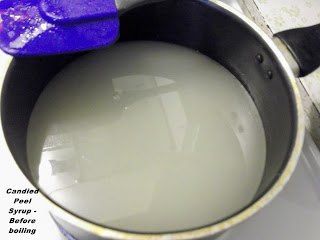
Cloudy Candied Peel Syrup
Bring to a boil 4 cups sugar, 2 cups distilled water and 2 tbsp Lemon Juice. 

I doubled this because I had two sets of peels to do.
Amber Candied Peel Syrup
Clear with an Amber color  


It looks like this until it boils and becomes:


All this looks like a great deal of work, in reality just cutting the peels off the fruit took the most time so far.
four pots on four burners of a stove
All four burners goin' at once...
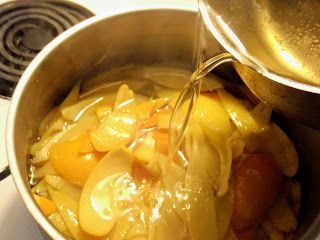
syrup poured on prepared orange and lemon peels


Pour the syrup over the prepared peels
simmering peels in syrup


Simmer for an hour on low heat, uncovered. 


Cover and let sit overnight in the syrup.
NEXT DAY  
candied orange peel just out of syrup


The peels have taken on a transparency. 
drain candied peels
Let drain for a few minutes, saving the syrup


Now we come to the 'gooey' part! 


dredge candied peels in sugar 
Take each peel and wipe off the syrup with your fingers, then dredge them in sugar...


candied and sugared peels


and set them on a rack. The peels are easier to handle after coating.


And into the oven they go! @ 200 F for about 4 hours to dry ~*~ checking frequently so they don't burn. 


I placed the racks as high above the element as I could to ensure no burning.
After 6 hours drying in oven they were still pliable until removed, when they became hard and chewy.


HINDSIGHT
Doing this the first time taught me a few things that I'd do differently the second time. 
  • I'd limit the oven time to 4 hours instead of six because that would be all they need ~ my thinking here is that they will be less hard and more chewy with less drying time.
  • Of course another option would be to leave them out to dry naturally but that could take 24 hours to complete, longer if the weather is damp and you'd have to have a fairly warm house.
  • I'd leave a tiny bit more pith on the peels than the 1/4 inch ~ this affects the end result.
You can do this with any citrus fruit, including grapefruit. Its worth a try to see if you like them and they are wonderful to put into a nice jar with a fancy lid and give as gifts for any occassion
Note that they are not a treat that you can sit and eat ten at a time, so they will last when stored in an airtight container. 

HAPPY 2012 CHRISTMAS  


 Catspaw


Tuesday, December 18, 2012

TIME AND MONEY SAVING METHODS FROM MY KITCHEN

Over the past three years, now going on four, on this island in the Atlantic ocean called Prince Edward... I have developed certain methods to s-t-r-e-t-c-h both my $ and my time to make my supplies last a little longer. 

Presenting; a few of them for the benefit of my readers.

1. This was the result of an experiment. I was curious what would happen... You buy green onions at the store and they are expensive enough but I found a way to use the 'green' part of the onions indefinitely using this method.
The white part with the roots is always cut away and tossed;
green onlons
Instead of doing that, one bunch of onions always goes into the drink to re-grow. Clean and cut off as much green as you are going to use then put the rest into a glass with an inch of plain water and set in natural light. Change the water every two days.
green onions in glass of water
 One week later, you will have this to use again:
grown green onions in glass of water
If you have a garden, instead of planting green onion seeds, plant green onions for the same result.

2. Although its preferable to make my own stock, in a pinch I have had to rely on store-bought. Several points about doing this I don't care for; the sheer amount of sodium, the chemicals added and the pure lack of flavor. When I have no choice I always want to cut the sodium in half by cutting the broth with an equal amount of distilled water as I don't use tap; for added flavor I rely on spices and flavorings. 
store bought chicken broth, pot and four cups of water
 3. Those tiny cans of tomato paste that you, more often than not, need only a tablespoon of, what do you do with the rest? Here's what I do:
frozen tomato paste and butter
Pop the can into a ziploc bag and freeze until the next use. Although its not a good idea to 'store' food in open cans, freezing the food does not allow for any unwanted interaction between the food and the metal container.
4. In the above picture you will also note what I do with butter ~ I buy several when on sale or I can at least get it for a decent price and freeze it. Butter freezes very well and the consistancey is not changed. 
5. I do the same thing with cheese I buy on sale and in bulk, margarine and cream cheese.
frozen cheese, margarine and cream cheese
 6. You will note the multitude of Ziploc Freezer Bags... these are full of meats. Whenever I purchase meat I never freeze them in the original packages. Rather I toss the thin plastic wrap that is not suitable for the freezer and the styroform that is very unhealthy, portion the meats and into ziplocs they go. 
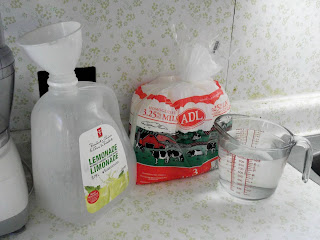
7. Now we come to one of my favorites, I buy whole milk and turn it into skim to make it go further and I use heavier juice containers to mix and store it in. 
whole milk and containers
One bag of whole milk = 4 cups; pour two bags into the container and add 4 cups of distilled water. If the container is not completely full, repeat in a second container and add to the first to fill it. Using this method I gain two things, the milk does not change flavor and I get an extra jug of milk free. 
8.  We are in the habit of throwing things away that can and should be reused. Because one box of Glad Ziploc bags costs over $3, I soap then lightly bleach water all my ziploc bags to sanitze and reuse them; this I do at least four times before tossing them. I also re-use aluminum foil if its not stained in cooking by simply wiping it clean, folding and storing it for the next use. I bake using parchment paper instead of oiling my pans; this saves on oil and doesn't add still more to what is being baked or oven cooked.
9.  For a cat treat I occasionally mix a half can of cat food with a handfull of dry kibble. It makes a nice change from the daily venue and my kitties don't harrass me for treats.
10. To saute vegetables or anything else for recipes, I use a veggie cooking spray instead of oil. This saves on oil and puts a lot less calories into the food. 
pan with can of vegetable oil spray
I hope you've found something useful in the shortcuts and savers I've been using; from my kitchen to yours...
Catspaw